This guide shows you how to move a mailbox in Exchange 2013 using the Exchange Admin Center (EAC)
Open up the Exchange Admin Center.
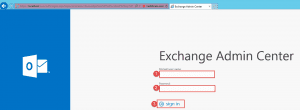
- Step 1 -> Enter in the user that has access to create databases. E.g. Domain\username
- Step 2 -> Enter in the password
- Step 3 -> Click Sign in
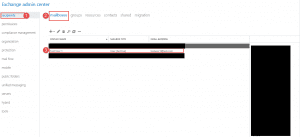
- Step 1 -> Click on Recipients.
- Step 2 -> Click on Mailboxes
- Step 3 -> Click on the mailbox you want to move.
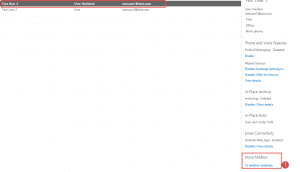
- Step 1 -> scroll down on the right hand side and then click on “To another database” to start the process.
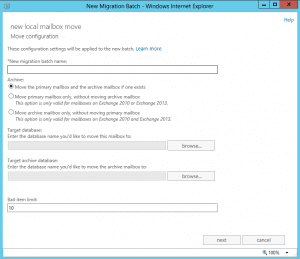
- The following window will show.
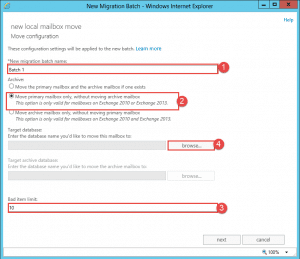
- Step 1 -> Enter in a batch name, we used Batch 1 in this example.
- Step 2 -> Select the option just to move the primary mailbox.
- Step 3 -> Enter the Bad Item Limit
- Step 4 -> Click the browse button to select the database.
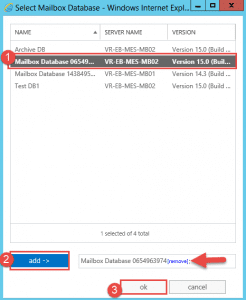
- Step 1 -> Click on the database name where you want to move the mailbox to.
- Step 2 -> click the add button, you will see the DB name appear in the text box.
- Step 3 -> Click OK.
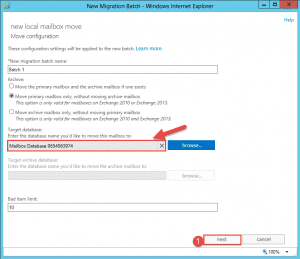
- As shown above the DB you selected is now shown under the Target database section.
- Step 1 -> Click Next.
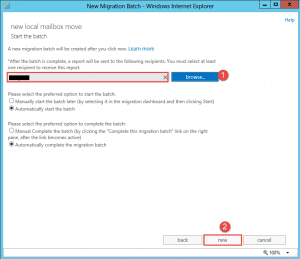
- You can select which user will receive the email once the batch completes. To select a user click the browse button.
- Once done you can review the batch options.
- When ready click the New button.
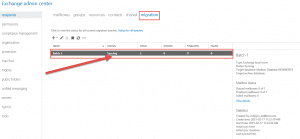
- You will get a prompt to take you to the Migration page or you can click on the Migration tab as shown above and monitor the status.
- Once completed the person assigned to get the notification will receive the email.
Hope it helps.
[yasr_overall_rating]
