When you introduce a new version of an Exchange Server into your environment, you want your users to be able to take full action of the new features and of course be on the new version of Exchange.
In this tutorial we will look at the following:
- Move a user from Exchange 2010 to 2016 using the Exchange Management Shell (EMS)
- Move a user from Exchange 2013 to 2016 using the Exchange Admin Center (EAC)
Let’s start with option 1:
Launch the Exchange Management Shell.
We will be moving Test user 3 in our lab which is on Exchange 2010. Run the following command:
- Get-Mailbox -Identity “Test User 3” | New-MoveRequest -TargetDatabase <Your 2016 MBX Server>
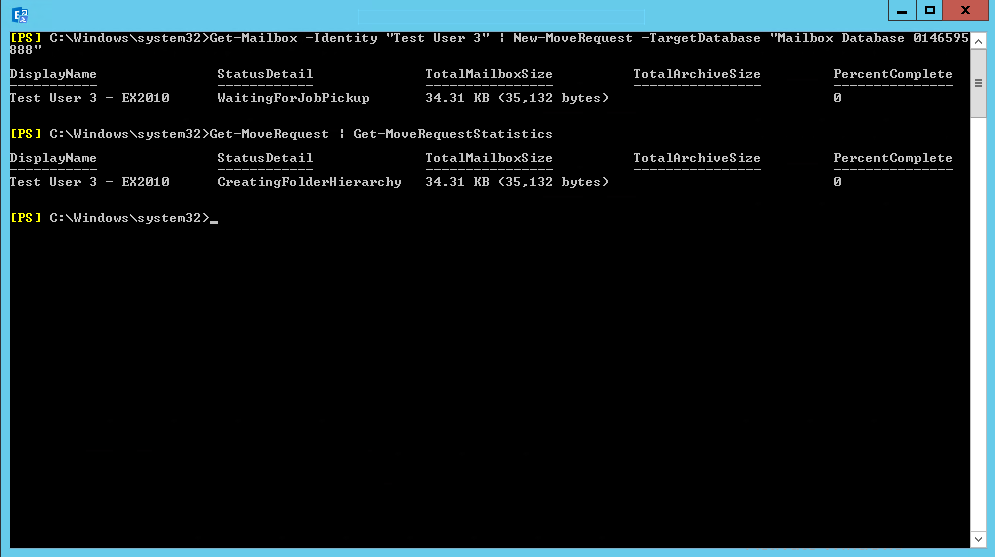
If you want to monitor progress of the move, you can run the second command as show above:
- Get-MoveRequest | Get-MoveRequestStatistics
This will give you an idea of the progress.
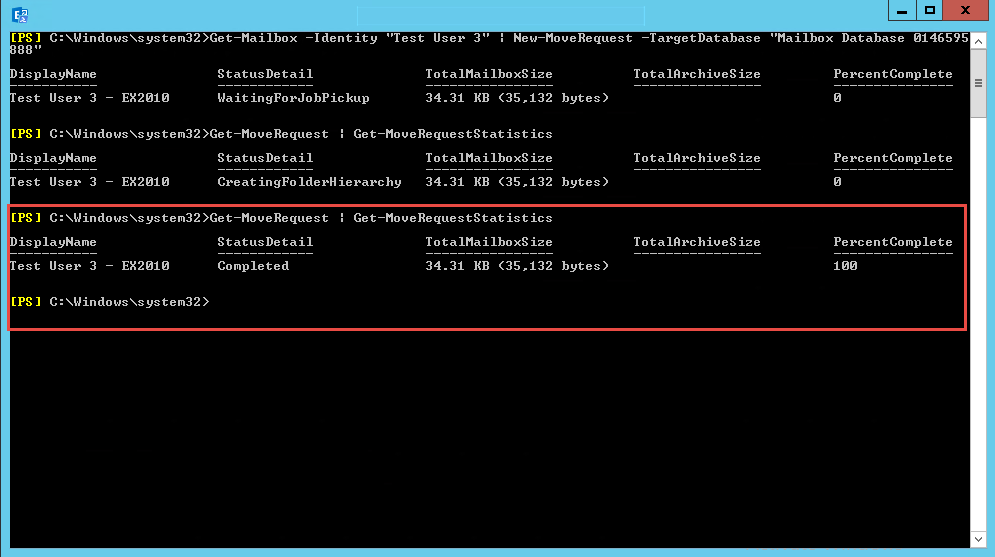
We can now see the move completed and the users mailbox is now on the 2016 Database.
Let’s move onto option 2:
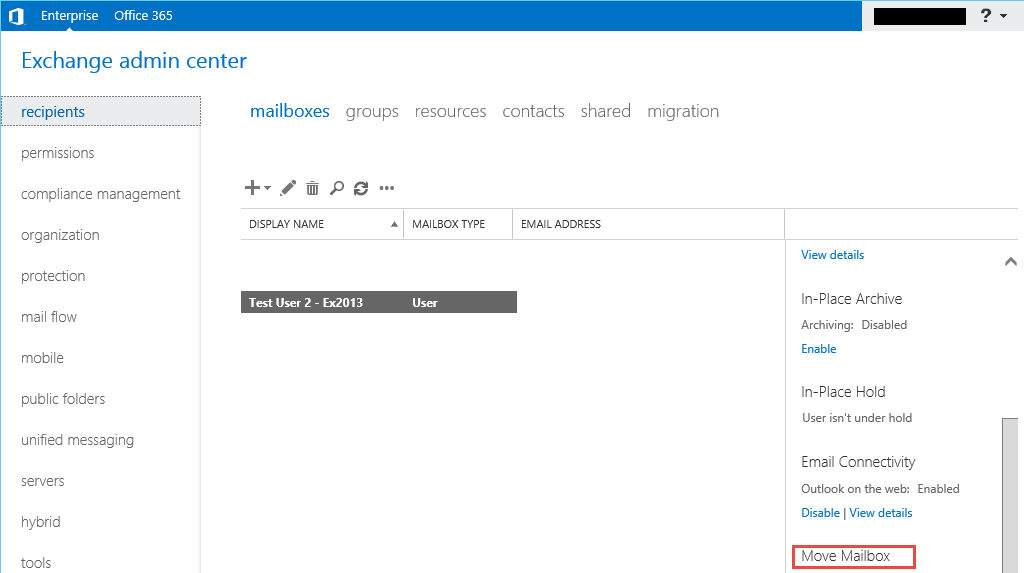
Open up the EAC and then click on Recipients -> Mailboxes.
Once you click on the user you want to move, on the bottom right you have the option to move to another database. Click on this link.
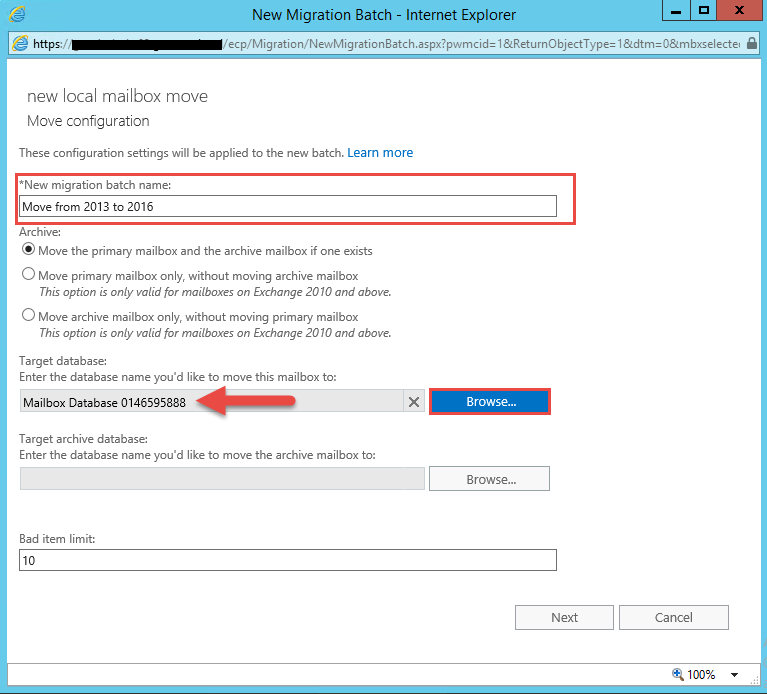
Once the link is clicked you will get a window as shown above. Enter in the following:
- Batch name
- Select the browse button to select a target database. A new window will popup, select your 2016 MBX server and then click ok to come back to this screen.
- Click next to continue.
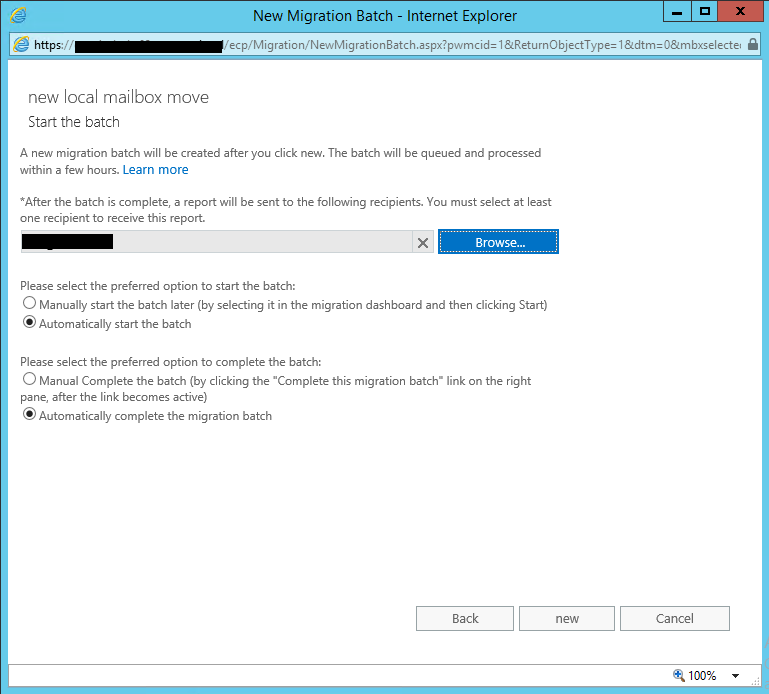
On the next window, you can specify who the batch report will go to. Once done click the new button.
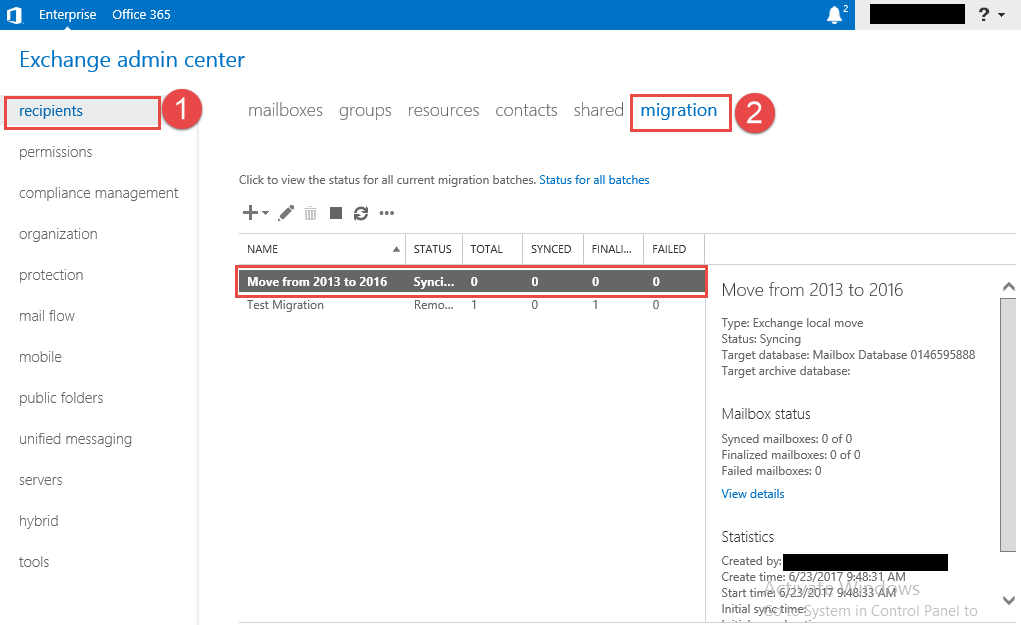
To monitor the progress of your mailbox move, you can click on the Migration tab still within the Recipients tab in the EAC.
So in this tutorial we covered mailbox moves using the EAC and the EMS.
Hope it helps.
